Sunday, November 12, 2017

Personal Blog

It's been a long time, people! I set some pretty big goals last year for my blog (like blogging once a week) and then I stopped blogging all together.

I took a step back to figure out what I really wanted out of a blog, practice my skills elsewhere, and come back with a better plan.

This year I had been writing down recipes with the intention of starting a food blog with the hopes of helping others eat healthy,  but these last few months have changed that plan again.

What I do know for sure is that I am taking this blog back to be a space for personal posts and family updates. A forever Christmas card if you will.

Here are some highlights over the year that I have not shared:

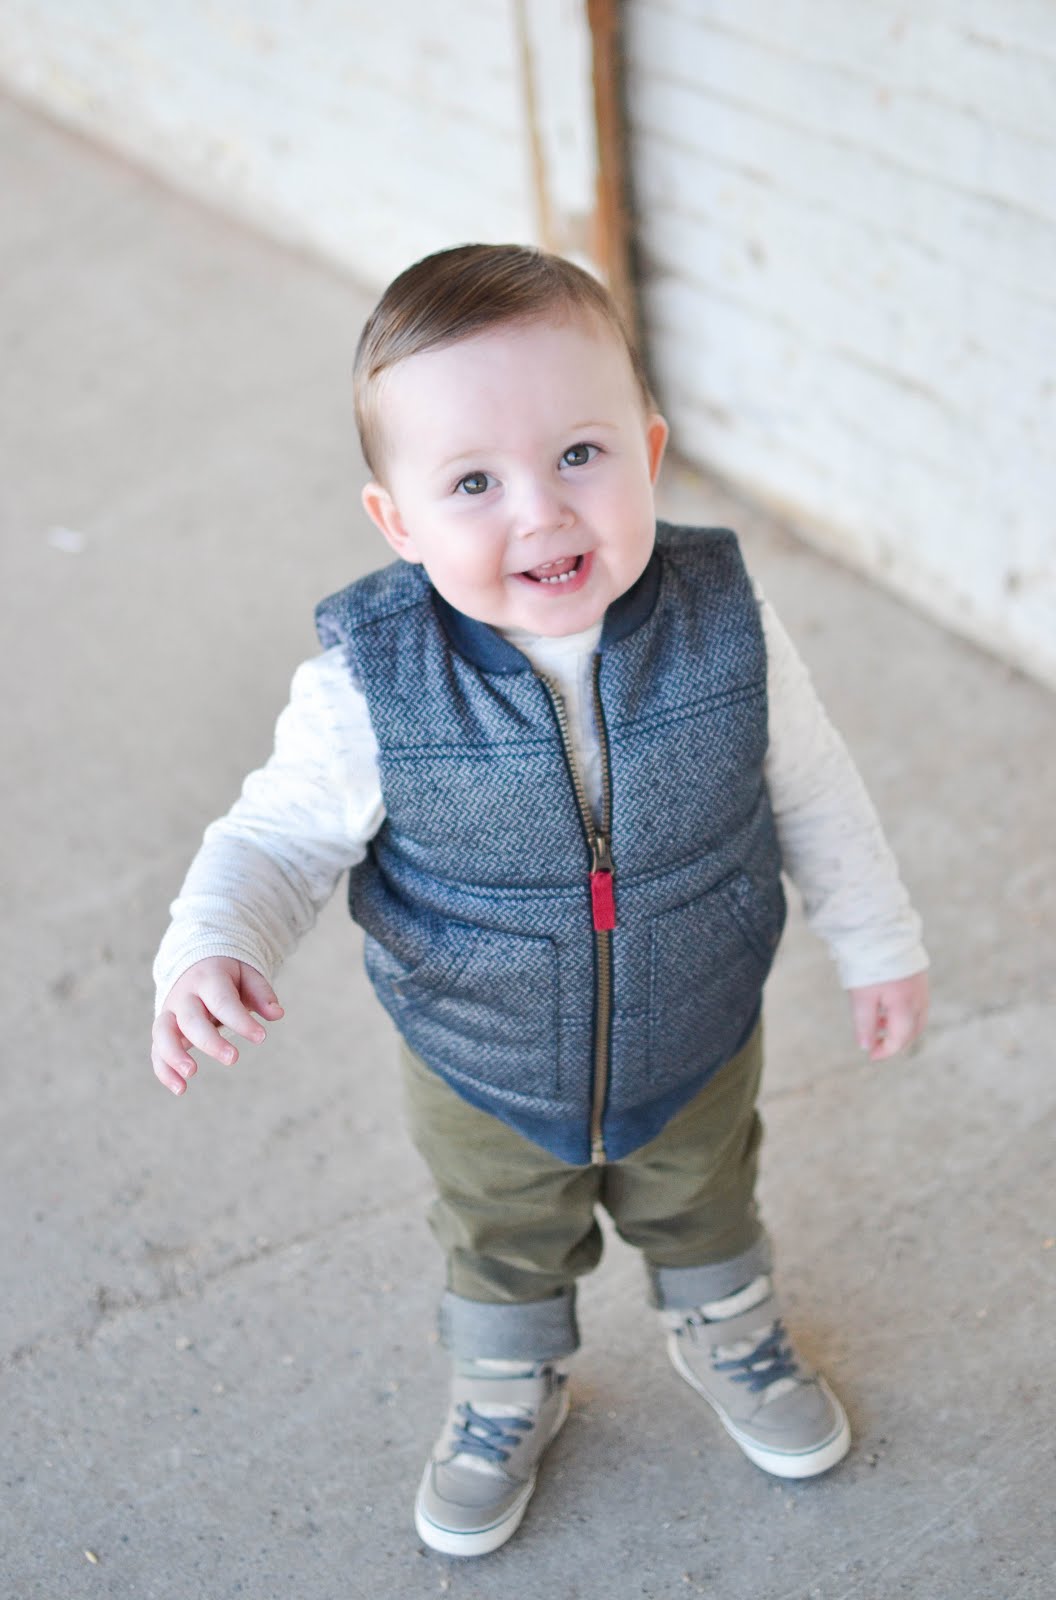
  • Ollie turned one in April! 
  • Mine and Andrew's business took off and we are now doing that full time while being at home.
  • I quit Thumbtack after 3 years and officially left the corporate world! 
  • We bought a new car in July that our family can finally fit in (2017 Hyundai Santa Fe).
  • Our home is almost completely done on the top two levels, we will be tackling our basement next year.
  • Olive got to meet his great, great grandpa (Oliver is the 5th generation)! 
I will post some photos below for safe keeping and for journaling reasons! If you want to follow along with my cute family and our day to day lives, follow the blog!

If you follow me on social media, you've probably seen these pictures before. I am posting them to look back on and my post more photos from this year just to catch up. Don't forget to click on the link for Oliver's birthday video! 

It feels good to be back! 

OLIVER'S BIRTHDAY: https://youtu.be/zWrMQWeI7hk 

Monday, February 6, 2017

DIY Bath Bombs - Lush Inspired


Hi, again! Can you believe that it is almost Valentines Day? I feel like it was Thanksgiving yesterday. However, I say that every year. I just want time to slow down a tiny bit! Especially since I now have a little human who is a constant reminder of how quickly time moves!

We are thinking of small gifts to give our loved ones and thought that bath bombs are perfect! Who doesn't love a good bath bomb!? We are a little obsessed with them at our house. The price tag of Lush bath bombs are not my favorite though and I wanted to save a bit of money. I tried a few recipes and ended up making this one and I have been dying to share it with you!

Ingredients
  • 1 cup baking soda
  • 1/2 cup citric acid
  • 1/2 cup epson salt
  • 1/2 cup corn starch
  • 3 tbsp. melted coconut oil
  • 1/2 tbsp. water
  • 2 1/2 tsp. essential oil 
  • Molds
  • Food coloring
  • Mixing bowls
  • Gloves
    Here is a bit of advice - splurge on medal molds. I used plastic molds and they broke after about 2 or 3 uses. And if they didn't break, they were a pain in the butt and wouldn't cooperate the way I wanted them to. You're welcome in advance. :)
Directions
  1. Whisk together all of your dry ingredients until it is as fine as possible.
  2. Mix together wet ingredients including the essential oils of your choice. My favorite essential oil mixtures will be down below!
  3. Using your whisk, mix your ingredients together S L O W L Y! I did a couple drops, whisked as fast as I could, then would do a few more drops. The batch prior I mixed the ingredients a little too quickly and had to throw the whole thing out. If the mixture starts to fizz too much (meaning you can hear it fizz after you mix it), you've activated the ingredients and you will have to start over.
  4. You may not need to add all your liquid, use your best judgement. Your mixture will feel like damp sand, you don't want it too wet. You're looking for a texture that when you grasp a bit in your hand it will stick together.
  5. If you decide to color your mix, separate your mixture into separate bowls and add a couple drops of food coloring. I used a ton my first batch and they looked beautiful, but freaked me out and I felt I would stain my bathtub. So the second batch (pictured) I only used 1 or 2 drops per mix. 
  6. Fill those molds! This is the funnest part (if you don't get the plastic molds)! Fill the molds with your favorite color combo and think about how they will mix in the tub! You don't need to pack the mix in too much, just a firm press will work perfect. Fill it a bit over the top on one side of your mold so that when you press the sides together they have a little extra to stick to!
  7. Keep them in the mold for a minimum of 1 hour then tap mold to get bath bomb out of mold. Let sit and dry for 24 hours!
Use them for yourself or wrap them in some fun packaging like tissue paper and ribbon and give as a gift! If you did buy plastic molds, they usually come with a little place to tie a ribbon, so you could just leave them in the mold for the gift! 

Remember to have so much fun making these! Invite your friends over or make them with your kids. Pop toys in the middle if you're making them for your kids and have them help you with the scent combos!

Current Favorite Essential Oil Combos
Eucalyptus & Peppermint - Relaxes muscles and clears sinuses (We all had colds! This was a huge bonus!)
Lavender & Bergamot  - Relaxation and sleep
Lemon & Rosemary - Clears your mind (good before mediation)
Grapefruit, Bergamot, & Peppermint - Energizing
Lemon, Orange, Bergamot - Mood Boosting

If you try this, tell me how it goes in the comments down below! Thanks again for reading and I hope you enjoy your bombs as much as we enjoy ours!


Sunday, January 8, 2017

Cashew & Broccoli Rice with Breaded Soy Chicken


Hi, wonderful people!

As some of you may or may not know, I started my journey of cooking about a year ago. I didn't know how to cook anything super technical or anything layered in flavor. I had only ever been taught how to cook comfort food, which was fine, when I decided I need to step up my game. 

This last year I have grown so much as a cook and the people around me are pretty dang happy about that! At this point in my progress I am learning huge lessons with each meal that I cook. After I make these meals, I am going to post the recipe, including the alterations I should have made so your dining experience is a little bit better than mine. I hope to continue to post my journey here for you to all share with me and to try learning along with me! If you try this recipe and you notice other changes that need to be made, let me know! I would love it if you helped each other improve this year. 

Okay, on to the recipe!

Are you from Utah? Then I am sure you are experiencing the same amount of snow we are. I feel like we have been snowed in for a week or two, and going out for almost any reason seems reckless. We were hanging out this morning, playing games and enjoying each others company when we started day dreaming of Chinese food. Two things: No one is coming to or from our house with the amount snow thats on the ground, and we are trying to eat healthy. So I decided to try my hand at making rice and chicken with what we had in our fridge. The result? To quote Andrew, "This meal is phenomenal."

Ingredients
  • 4 boneless chicken cutlets or tenders
  • 2 farm eggs
  • 3 scallions
  • 1 cup Jasmine rice
  • 4 cloves garlic
  • 1 pound broccoli
  • 1 1-ince piece ginger
  • 1 tablespoon sesame oil
  • 1/4 cup all-purpose flour
  • 1/4 cup cashews
  • 1/4 cup soy glaze*
  • 1 teaspoon garlic powder
  • 2 teaspoons black and white sesame seeds (to top the meal with)
Instructions
  1. Preparation. Wash broccoli and cut into small florets. Grate ginger and mince garlic. Slice scallions then separate the white ends from the green. Put eggs in a small bowl and whisk until thin. 
  2. Bring 1 1/4 cup water, a big pinch of salt, and rice to a boil on high, then reduce to low and cover with a lid. Let simmer 12-14 minutes or until rice is tender. Fluff with a fork.
  3. In another pot, bring a water to a boil. Once boiling, put broccoli into water for 3-4 minutes or until tender and full of color. Drain and set aside.
  4. Salt and pepper chicken on both sides, then cover in flower. In a skillet, heat a dash of sesame oil, 1 garlic clove, then place chicken in pan. Cook on both sides 4-7 minutes or until browned and cooked through. Put the remaining soy glaze in pan with chicken and cool another 2 minutes, periodically spooning glaze on to chicken.
  5. In a deep skillet, put in a dash of oil (sesame or olive is fine), 3 garlic cloves, ginger, whites of the scallions and heat until fragrant. Put cashews in once fragrant for 1 minute. 
  6. Put cooked rice and broccoli in the skillet and mix. Once mixed, pour in eggs, sesame oil, and 2/3 of the soy glaze. Cook for another 2-3 minutes, salt and pepper, sprinkle with garlic powder, then set aside. 
  7. Plate chicken and rice, top with green scallions and sesame seeds. Serve hot. 
Soy Glaze* - I could not find soy glaze anywhere, so I just kind of made up my own. Then I realized there are probably recipes out there for this. I found this one that looks similar to what I did if you need a bit of a guide: Sweet Soy Glaze Recipe from Olgas Cooking

Enjoy!


Sunday, January 1, 2017

2017 New Years Resolutions


Happy New Years, fellow readers! Bringing in this 2017 new year was the first time I felt a bit of sadness saying goodbye to a year. 2016 was seriously the best year of my life bringing me a new baby, a new house, a new business, and new challenges. But with all the challenges it brought, it has taught me so much. It's taught me not to be so hard on myself, to let things go, and to push myself just a bit further than I thought possible. As I laid Oliver down one last time in the year he was born, I got a little bit emotional and held him just a little bit longer. 

Then I started thinking about all the great things that are to come in 2017. I will get to watch Ollie grow into a little toddler, grow our business even more, and strive to make 2017 better than 2016. So in an effort to kick off the new year on the right foot, I am starting with a blog post of my top 10 new years goals. I say goals and not resolutions because, in my mind, resolutions are intentions with no accountability, no laid out plan, and nothing to really check off. I like the term "goals" because it feels more tangible to me. I know I can write down a stretch goal (bigger goals) for the day and the year along with smaller goals to get there. So here we go. Top ten goals:

1. Blog more.
I have seriously been slacking with my blog. This blog has brought me so much joy this year and I need to take more advantage of it. I need to post as many personal blogs as I do "how-to" blogs and keep it as a sort of journal. My goal is to blog at least once a week with an additional two through out the month on family updates.

2. Read more.
When I was younger I used to read a ton. But for some reason I haven't been able to get into my reading groove again. Then I discovered audiobooks and I think that I can change the way I read. I have an hour commute to and from work each day and at that rate I could bust out books so quickly. I set my goal at 20 books for this year. That doesn't seem like a lot to most people, but its a lot for me. And if I can meet my goal of 20 books this year, next year I will double it. Finding time to read is so dang hard sometimes, right?! But lets all set reading goals together here at Good Reads! Add me and lets keep each other accountable! -- and also, share your favorite books with me! 

3. Stress less.
I stress. A lot. I stress about my house not being clean all at once (like that will ever happen again) and I stress about work. I am learning to not get so worked up and to not let the things I can't control get to me. Breathing more before reacting is something I have always struggled with and I need to step back and realize somethings are out of my control. Stress causes frustration. And frustration ruins relationships and causes everyone around you extra stress. I've gotta stop and appreciate what is good. Always. 

4. Learn Spanish. 
I started this goal last year but stopped. This is a goal that everyone in the house needs to do at the same time otherwise it's ridiculously hard, and Andrew and I were never doing it at the same time. So this year, we are all doing this together. Oliver, Andrew, and myself will finish all of Spanish Michel Thomas  (which I highly recommend) and then start Rosetta Stone. 

5. Count Macros.
I am generally pretty good at eating healthy, but sometimes I lose track of what my body needs. Counting macros helps me reach weight and health goals by remembering for me. This is something I highly recommend to anyone who is interested in eating better. :)

6. Exercise. 
I don't exercise. Like, at all. I have a huge space in my home for work out equipment, yoga, and free weights. But once it turned into sweater weather, I didn't seem to care more. And somehow sweater weather happened the same week as Thanksgiving ;). But this year I am setting the goal to work out 4 times a week including yoga twice a week. I need yoga for my mind and body, who doesn't?

7. Meditate. 
As stated above, I stress a lot. I also need a space to work on myself without disruptions. Your mind is a muscle and needs exercising, too! Mediation can be used for calming, setting goals, sleep aid, you name it. All you need is 10 minutes a day. The best place to get started is an app called Headspace. Thanks, Tanner, for the recommendation. I love this app! 

8. Play more games.
I love games. For those of you who follow me on Instagram and ever watch my stories will know that me and my family are avid gamers. Everything from Magic the Gathering to Resistance. The best thing about games is that it brings me closer with the people I play them with. Andrew and I bond so much when we play Magic together, it's the best game I have ever played, and I want Ollie to grow up playing. I need to prioritize spending time with my family in this manner instead of doing meaningless tasks around the house. I should really add "clean less" to my new years goals.. :/

9. Grow our business.
For those of you who don't know, Andrew and I started a social media company. That is part of the reason I haven't blogged much or posted on my insta too much. All of that effort is going to a few companies we are helping grow and it is taking up so much of our time. Its so fun and rewarding, though. But most importantly, it gives us the ability to keep Ollie at home and not in a daycare. We want to double or triple our business this year and become a stay-at-home family. We love everything about our business and what we are able to do for other companies. But it's time we step up our game to the next level. 

10. Cook with new ingredients.
If you remember correctly, this time last year I didn't really know how to cook. I was learning and learning slowly. So I decided to set a goal for 2016 to learn to cook. And guess what? I knocked this one out of the park. I am now getting compliments along the level of, "You could be on Master Chef." That is amazing, right? So this year, along with working on becoming an even better cook, I am going to really step out of my comfort zone and cook with a new ingredient every month. Now, I may cook with more than one new one a month, but at least one is what I am shooting for. I will document my adventure here (I need to post my recipes more on my blog) and maybe you all can help by recommending new fruits and veggies! 

I hope these new years goals gave you ideas for a couple new ones for yourself. Tell me what your goals are and lets help each other in 2017! 

Happy Goaling! 


Tuesday, December 6, 2016

Bleach Your Hair At Home


Helloooooo again! I've missed you! I have to get better about taking time away for myself every week to blog. I love it and I always feel a weight on my chest when I miss a week, let alone a month or two.

I have something I have been dying to share with you, though. For those of you who don't know me, I have had dark hair my entire life. Recently (a month or so ago) I decided it was time for a major change. I cut about a foot off of my hair and bleached it. All of it. And because I was bleaching it and knew I was going to ruin in anyway, I went all in and bleached it white. After I bleached it I started getting a lot of questions and thought I could share it here for anyone else who is interested.

I have a friend who has the most beautiful hair I have ever seen. It's white (sometimes pink or purple, too) and amazing. Her natural hair color is even darker then mine but decided to bleach hers on her own. She alone gave me the courage to dive in. Thanks, Alexa. <3

This is that part of the blog where anyone who is actually a hair dresser looks away. For real, this may kill you. I have only bleached my own hair and I have no formal training, so please take what I say with a grain of salt and do what you think is best for you. So if yyou've money to spend and the time to match, go for it. I on the other hand don't have a ton of extra cash and definitely not the time to make multiple hair appointments. I just wanted a quick change and after years of debating decided it was do or die.

What you need:
  • Bleach - I recommend a tub instead of individual packages. Way better deal if you plan on dying your hair more than once (which, you'll probably do it at least twice the first time)
  • 30 Developer - Or whatever your brand of bleach recommends. Darker hair = higher volume
  • Wella t18 Toner - If there is a better toner, please let me know. This is what everyone recommends
  • 20 Developer - Again, do as the package of toner says. It may say 10 but I use higher of everything then I should. Shhhh
  • Gloves - Super necessary and you're best to get reusable (sometimes even a nice set of kitchen gloves work-- as long as you only use them for your hair)
  • Hair Clips - Or any way to hold your hair in sections, but clips work the best for me
  • Brush - Usually only a dollar or two and something you should always have in your arsenal 
  • Mixing Bowl - Any sort of plastic bowl will work if you have one on hand
  • Deep Conditioner/hair mask - What I use varies from time to time and sometimes I use oils instead. Find one that works for you, but remember you usually get what you pay for in this department
  • Purple Shampoo - This is a must have for maintaining that super blonde/white hair in-between bleaches
Ready?
  1. Part your hair into 4 sections
    Two top sections and two bottom sections.
  2. Put your gloves on
    This is a must and you will regret it of you don't. I've forgotten once and got little white burns on my finger tips that didn't go away for days. Ouch.
  3. Mix bleach according to package
    If you're a hair stylist and still reading this, look away now. You may puke.
    I have zero patience to get my hair blonde overtime. I wanted it white as soon as I could get it white. Now, that did still take me about 8 weeks to get it to how it is now, but it would have taken so much longer had I went to a professional. That said, I do not mix the bleach according to the package. This is where I veer..

    I do mix it proportionally to the package, 1 scoop bleach to 2oz cream developer. However, I will use mostly 40 developer instead of the recommended, put in splashes of 10 or 20 and a little deep conditioner. Sometimes I put a little coconut oil or something similar to help moisten my hair while I bleach the crap out of it. It may not do anything, it may do more damage, but I feel like my hair is really healthy after all this time and I think this is why. Again, I just think its better but I could be totally wrong. Basically, I just make myself a little concoction and hope for the best.
  4. Apply your bleach
    Start by gathering thin slices of hair and starting the application on the roots then dragging down covering the whole piece. Although impossible, try not to get it on your scalp as it can start to burn over time.

    Now, again, professionals would probably recommend starting on the bottom sections of you hair. The bleach will stay on it the longest but most likely get less damaged due to the little amount it gets touched with hands and hot tools. But what do I do? I bleach my top first. I know the risks but I want my hair on top the lightest since it is seen the most and am willing to let it be a little more damaged (it isn't too damaged yet, fingers crossed).

    Leave it on for about 45 minutes, or as recommended. Remember to check your hair occasionally for lightening.
  5. Wash it out and bleach again
    This is where you decide if you need to bleach it again. If you don't feel it is very light, I'd recommend giving it one more bleach. If you are going to bleach it again, make sure dry it first. Using a lower developer then you used the first time and repeat steps 1 through 5. Remember that your hair is fragile so this second time don't be as harsh on it.
  6. Let's tone
    Once we are done bleaching, we get ready to tone. Don't worry, you can keep your hair wet for this part! Mix the toner according to the bottle. I used 20 developer instead of the recommended 10 the first couple of times. I don't mind if my hair goes a little purple and I wanted drastic results. Put it all over your hair like a conditioner and wait. Some people only leave it on 10 minutes, others leave it on 45. It really is up to you and how long you can endure the pain. The longer you leave it on, the less yellow and more white/purple it becomes. If you want to leave it on longer, use a lower developer (10).

    Once I apply my toner I do everything I can to distract myself. Read a book, fold towels (careful not to get this toner on any laundry or rugs, it will stain), go on a walk, anything really. The more distracted I am the longer I can keep it on. Can't take it any longer? Wash it out.
  7. Deep condition and purple shampoo
    Your hair just went through a lot and it's important that you take care of it. Once you wash all the toner out, condition it like crazy. Use oils, deep conditioners, masks, or make a conditioning concoction (like our bleach!) since you're now practiced in the art of mixing. Use the purple shampoo as needed, I recommend every other wash but be careful, your hair may actually go purple over time but will wash out with only a couple washes. 
Alright, now that is taken care of lets note a couple of things:
  • It took me a total of 8 bleaches and about 5 toners to get my hair the color it is now. I think I did bleach mine 3 times the first time gradually decreasing the time and developer strength each time.
  • It's a lot of work and a huge commitment. It takes me hours and hours every 6ish weeks, so make sure you have the time.
  • I do a bleach wash every couple of months on my entire hair to maintain my color of hair.
  • I am not a professional and obviously don't claim to be so please follow my instructions using caution.
  • That being said, just go for it. Always wanted to bleach your hair? Now is the time and do it yourself and I believe in you! You'll save so much money and its a good skill to learn, I think.  I honestly don't know the next time I will pay someone to do my hair.

Wednesday, September 28, 2016

Poblano Chicken Tacos


It's FALL!! Can you believe it? I am so ready for sweaters and soup I can hardly contain myself. I write this with the window open while seventy degree fall air blows through my house. This is one happy momma.

People who know me know that I have been learning to cook this last year. It's always been a goal of mine to be as good of a cook to my children and husband as my mom has been to her family. I've been trying new ingredients I had never heard of, vegetables that would usually intimidate me, and most importantly I have been trying to make things on my own.

This recipe is one that I have made based on a bunch of different recipes. I have made changes that either fit my fridge or my bank account.  Poblano peppers are one of my new favorite peppers and this is one of my family's favorite recipe.  After making these for almost everyone that has eaten in our home I have decided I should probably write it down. These Poblano Chicken Tacos are seriously the easiest, yummiest tacos. And did I mention easy?  They are so full of flavor, your family and friends are going to think you slaved over them forever. I have been dying to share this on our blog! Ready? K. Here we go.

Disclosure:

I am not a fancy cook. Nor do I know how to take good food photos (lots of times I eat them before I can take a photo.. #noselfcontrol), so if you have any questions or suggestions on how I can improve the recipe explanation process, please let me know. Ya'll are dope.

Poblano Chicken Tacos
Ingredients:
  • 2 teaspoons cumin
  • 1 1/2 teaspoon chili powder
  • pinch of salt
  • 3 tablespoons olive oil
  • 1 Poblano Pepper (sometimes I use two)
  • 2 large chicken breasts (use your best judgement depending on how many people you're feeding)
  • 1 can of corn, drained
  • 1 bunch of cilantro
  • 1/8 cup water
  • Small flour tortillas
  • Optional: queso fesco for topping if you want, but I skip this 1/2 the time.
Directions:
  1. Cut and chop peppers, chicken and cilantro.
  2. Heat oil on the stove and add the peppers. Let cook for about 3 minutes on their own. 
  3. Add chicken and stir occasionally
  4. When chicken is half way cooked, add cumin, chili powder and salt. Depending on how much oil is left, this is where I will add a little bit of water to the pan to make sure everything gets coated in the seasoning. 
  5. Once chicken is cooked, add the can of drained yellow corn. Cook until hot.
  6. Heat tortillas and put mixture inside. 
  7. Top with fresh cilantro (don't skimp on this part, it makes the whole taco!)
Feeds 4 and makes great leftovers!

These are probably in the top 5 of favorite tacos I have ever eaten, and they are so flipping easy. Comment down below if you tried them and tell me what you think! I think I am going to start posting recipes a more regular thing. Somethings are just too good not to share!


Friday, September 16, 2016

Becoming a New Mom - 5 Ways to Prepare


If you're reading this, there is a good chance you're having a babaay! So let me first say congratulations! You're preparing mentally and physically for your life to change. You're making lists and checking things off (I did that, check here for one of my many lists). But I am not sure much can actually prepare you for having a baby. You'll bob, your baby will weave and no matter what, it's going to take a couple weeks to really get into a groove. The baby groove, if you will. #babygroove? I'm making it a thing.

Here are a few things I have learned in the first 4 months of motherhood. And if this advice helps just one person, that's good enough for me.

1. It's okay to ask for help. 
You'll think you can do everything by yourself. I know I did. I would ask for help from my husband, but feel bad because he was also working. What you don't realize in all your mommy haze is that other people are just as capable as you. And not only that, other people want to also bond with your new baby. Let them. Its good for your brain to take a break every now and then. I also asked for help from unlikely people for unlikely reasons. Don't be ashamed or feel like your a bad parent if you do the same. Regardless of what you need and from whom, you're a rockstar mom. Don't forget that.

2. You will use a fraction of the things you buy.
No joke. You need about 1/4 of the junk you buy. At least right away. Wanna know how many times Ollie has slept in his crib? Less than ten times. I am going to make a list of things I feel I need, but the short version is: clothes (not many at all), receiving blankets, feeding stuff, diapers & wipes, small space for him to sleep, burp clothes and soap. Thats it. Maybe you'll need medicine and such, but buy it as you need it. Don't over do it.

3. Don't spend a lot of money on clothes.
I made this mistake. I bought so many cute outfits. Some more expensive than clothes I would buy for myself. But guess what PJ's were my favorite for him? Ones my mother-in-law got at Walmart for $1.00. One. Dollar. Also, if you could see how many clothes he didn't wear in the first two sizes you'd be sick. I made the mistake of taking the tags off everything or I would take them back for sizes he wears now. Buy what you need. Not seasonal (you don't know how fast or slow they will grow) clothes. Just plain, basic shirts, pants, and socks. Sooner than later you'll have your own opinion on what you prefer (buttons v zippers, etc.) and be able to pick out clothes faster than you'd imagine. You'll thank me.
I feel so strongly about this that I wrote a whole blog post on this specifically. Check it out here.

4. All the things people say about becoming a parent is true. 
"It's different when it's your own kid" "You'll just know" & "You wont be able to remember a time without them" are all things that made me cringe when people would say this. I once had a conversation with a couple of mom's who told me life was gray before kids and I don't know love yet. It's all true. It's so hard to explain (another thing people say that drove me nuts). But I am now one of those moms. And its amazing. And the biggest thing? It really does come naturally. So relax and enjoy yourself. This time is so special.

5. Don't take your pre baby plans too seriously.
You've read books, got advice, saw other parents and decided the do's and don'ts. So much of that goes out the window when you have your baby. I said I wouldn't feed Ollie a bottle. Guess what? He ate more than I could make, so now we are primarily on a bottle and there isn't much I can do about it at this point. He falls asleep in bed with me.. also something I swore I would never do. Anything you can do to make your life easier and to keep everyone happy, do it. Sure, read your books at take advice. But don't take it too seriously and stay flexible. Find what works for you and your baby. It's going to be different for everyone.

What other advice would you give a new mom? Comment down below!


Wednesday, September 7, 2016

5 Ways to Save Money on Baby Clothes


Hi, new moms or moms-to-be. It's nice having you here!

If you're like me, you're excited to dress your little dude or dudette in the hippest, cutest, and most expensive clothes you can get your hands on. $60 rompers? You've got 4. And no matter what anyone says, you're going to buy the best. I know. Why? Because I was that mom just 4 months ago. My baby wasn't going to be going through clothes the way other kids were. I had this thought in my mind that he was going to grow at the pace of the tag on the clothing. I even bought a 12 month onsie because I thought, "Oh, this would be so cute to see him walk in!" But guess what? My man is 4 months old and weeks away from fitting into that cute shark onsie that I spent wayyyy too much money on. And guess what? He can't walk. Bummer.

I have learned a few things about baby clothing and I would love to share my thoughts with you so you don't make the same mistakes I have made. I might be able to make you feel better about not buying the trendy clothes and save you a little cash!

Tip #1
Take all the hand-me-downs

All those people who offer you clothes from their kids? Take them. For whatever reason I turned down clothes from everyone except my sister. Whhhhaaat a mistake that was. Kids grow way too fast to be buying that amount of clothes every couple of months (or weeks). If you find someone you can share clothes with, do it. When/if she has another baby, I will give them right back along with the things I've bought. It's officially my number one money savor when it comes to the kiddos.

Tip #2
Get all sizes of clothes

Whether you are buying your own clothes or telling people what size of clothes to buy (at a baby shower or just from friends & family who want to give), get sizes at least up to 18 months. I was only wanting clothes in the baby phase. When I got something that was over 9 months I thought, "Huh, this is weird? I'm not going to need this forever!" Wrong again. We are almost grown out of the 9 month clothes and I am low on clothes already. I went from him having 20 - 25 onsie pajamas to having to do laundry every couple days because we now only have 7 (he pukes so much).

Tip #3
Don't spend too much on clothes

And take this one as literally as possible. $1 sales at Walmart? Stock up. I bought clothes for Oliver that I would have never spent that kind of money on for myself. He has a tiny little jacket that is nicer than all the clothes I own put together and he has worn it maybe twice. Get the cheapest pajamas you can find. I have a favorite brand at Walmart that are regularly $15 but when they go on sale they are only $1. I buy as many as they have in Oliver's sizes. I like them 10x more than the ones I spent a fortune on, and they are so much cozier.

Your baby will grow out of their clothes so quick you'll never even get a photo. This is the major area I know I could have saved the most money on when preparing for my baby bird. I say one or two good outfits for family photos or monthly updates per size and the rest can be basic and cozy. They are going to puke all over them anyway.

Tip #4
Buy gender neutral 

I only have one baby, but I plan on having more. I don't want to buy all the clothes over again so I buy as many gender neutral pieces as possible. Space, science, sports, all can be worn by a girl so don't forget to think ahead!

Tip #5
Stick to one theme/color palette

The last thing I would recommend is to try to have all your clothes match each other. We wear a lot of gray, black, blue, and white so that (hopefully) all the shirts match all the pants. Your clothes are only going to stay organized for a bit, and after about a week or two, half your clothes are going to be dirty and the other half are going to be in a clean pile in the crib. Having all your piece match will make for easily getting your babe dressed all the time!


Saving on clothes is the last thing I know you want to do. You are ready to blow a whole month's paycheck on getting new threads for that cute little baby of yours. But don't. Everyone told me this same advice and I didn't listen but really wish I had. So here it is for you. And it's free. ;)

I am always looking for more ways to save, so comment down below with your tips! And if you have any suggestions, send them my way!

You're the best,


Thursday, September 1, 2016

How to Stain Your Cement Floors

Hello, dudes. It's been a while! Andrew and I have been crazy busy remodeling our house, working, and raising a barf bucket we like to call our child. I have a ton of projects I want to post as well as new finds that I can't wait to share with you. Those along side family updates should get this blog back into the groove of things and quick. I've missed being here and I know you've missed me! 

I hope you enjoy the first of many DIY blogs I've got coming. They're going to rock your socks. 

Five Easy Steps to Stained Concrete

Whether you have cement outside, in your garage, or in your home (like us), you've probably thought about ways you can change it up but without the cost of buying new flooring. We thought the exact same thing. We had just redone the top 2 floors of our house and had just our basement left. The walls aren't done, but we knew we wanted to utilize the space until we could afford to frame it. We wanted a space to do yoga, run on our tredmill, and even put a spare bed for guests when they stayed but we didn't want it to feel dark and cold. My parents stained their floors and I thought it was also the perfect solution to our problem: wanting to change everything on the smallest of budgets and not wanting to do much work. :)

Follow the instructions below for a cheap, quick way to refinish your concrete!

What you'll need:

  • Pump Sprayer - $13 - I got mine at Kmart in the garden section
  • Acid Wash - $35 - Rust Oleum 1 gallon
  • Base coat of stain - 2/$25 - I got 2 based on the size of my floor (approximately 600 sqft) and the color Sand. Amount will very based on size of your project
  • Top Coat of stain - $25 - I got one since its not a thick coat and of a darker, more chocolate brown (if I had to do it again, I would have picked gray then black on top).
  • Sealer - I don't remember the exact price and can't seem to find it on the Home Depot website, but just ask someone. I got the Wet Look Sealer and I think its only $20.00 a gallon
  • A floor squeegee 
  • A metal scrub brush
  • Gloves
  • Eye protective wear
  • Garbage bags
  • Boots
  1. Dress appropriately. 
    Put on your eye protective wear, long pants, boots, long sleeved shirt and put garbage bags over your shoes for extra protection. The first part of this job is the hardest and can actually hurt you if you let this stuff get on your skin. Please be extra cautious.

  2. Using your sprayer, spray the acid wash on the ground and scrub.
    Assuming you're doing this on already cleaned floors, the spraying and scrubbing shouldn't be too bad. Spray a 10x10 area of acid then wash it off with a hose. Squeegee the excess into a drain then move onto the next 10x10 area. Note: Learn from me and be sure to not just dump the acid wash on the ground. Every place it hits the ground will be noticeable and you will be left with what looks like spilled water all the time when you're done. This step is the least forgiving.
  3. Base coat.
    24 hours after cleaning your floor, put on your base coat. Use the spray pump and try to get it as evenly and thick as you can, but remember not to get it too wet or thick that it bubbles.
  4. Top coat.
    One of the hardest parts of this job is waiting. 24 hours later apply the top coat. I went over mine lightly and evenly then did another top coat the next day with what I had left just to make it extra dark. But that is totally preference and one time through will work perfect. Don't forget to wash your tools in between coats!
  5. Sealer.
    Spray down the floors with sealer after the top coat has dried. I waited 24 hours in between everything just because it was easy for me to remember to do this the same time every day. Once down, don't walk on it as any foot traffic at all is noticeable and will be there forever. I then waited 72 hours (per the back of the bottle) to bring in any sort of furniture. 
The entire project took about 4 days total, but it was also one of the easiest jobs in the house so far. One hour a day and an hour extra of podcasting. Comment down below if you have any questions or know of any additional tricks! I'll tell you that as soon as my garage is cleaned out I will be looking for fun and easy ways to finish the concrete in there as well. 


© Birdie Who
Maira Gall